.png?x-oss-process=image/resize,h_100,m_lfit/format,webp)

.png?x-oss-process=image/resize,m_lfit,w_200/format,webp)

热门产品

Popular articles
Breaking News! Millions of Chinese electronics removed from US shelves: What categories are affected? How severe is the damage? How can sellers remedy the situation?
How Can Foreign Trade SOHOs Improve Overseas Customer Search Exposure through SEO Optimization? A Comprehensive Guide to Practical Techniques
Struggling with High Costs and Poor Results in Traditional Customer Acquisition? AB客 Engine Enables Automated Precise Lead Generation
In-depth analysis and intelligent solutions to the five major pain points of foreign trade B2B marketing
Leveraging AI-Driven Localized Content Generation to Break Through Language and Cultural Barriers in the Southeast Asian Market
Foreign trade geek practice: Accurately lock in customers and double the transaction volume in three months
Breaking News! Mexico imposes 10%-50% tariffs, targeting non-free trade countries! Will China's textile, automotive, and electronics industries face a devastating blow?
Guide to Building B2B Export Customer Personas: Precise Classification Methods from Industry to Procurement Cycle
Recommended Reading


.png?x-oss-process=image/resize,h_1000,m_lfit/format,webp)


.png?x-oss-process=image/resize,h_1000,m_lfit/format,webp)
A daily tip for building a website for foreign trade: Optimize website image size and clarity in 5 minutes
This article shares the most practical free image processing tool tutorial for foreign trade beginners, helping you to compress, optimize, and improve the clarity of website images in 5 minutes. Even beginners can use it without needing Photoshop, making their foreign trade websites faster, more visually professional, and with higher conversion rates. It's suitable for all independent B2B foreign trade websites.

Why optimize website images?
Original images are often large and slow, which can slow down homepage loading speed, reduce SEO and conversion rates; proper compression and slight dimming can reduce file size by 30%–70% without significantly sacrificing visual quality , thus improving the user experience.

Quick 5-minute hands-on process
Preparation: Select a suitable original image to use (usually a phone's original image or a large image provided by the manufacturer).
If you want to create a homepage banner or product thumbnails, follow the steps below.
Minute 0: Determine the purpose and target size
-
Banner (desktop image): Target width 1920px (height depends on design, commonly 600–800px).
-
Product thumbnail: Target width 800px (square image 800×800)
-
List/card images: Target width 400–600px
Rule: Scale to the target pixel size first , then compress. Do not upload the original 4000×3000 image directly.
Minute 1: Zoom in using a free tool (online/offline, choose one)
-
Online: Photopea (free web version, works like Photoshop) or Pixlr (lighter).
Steps: Open → Image → Image Size → Set the width (e.g., 1920 or 800), confirm and then export.
-
Offline: GIMP (free) or the pre-installed image viewer can also resize the image.
Minute 2: Fine-tune brightness/contrast/sharpness (using Pixlr or Photopea)
Objective: To make product details clearer and prevent the background from being overexposed or underexposed.
Steps (Pixlr example):
-
Open the image → Adjustment → Brightness & Contrast
-
Slightly increase contrast (+5 to +15) and brightness (±5) – adjust to what feels comfortable to look at.
-
If there is slight blur, apply Sharpen (small radius, small amount).
-
Save as an intermediate file (PNG is recommended for transparent or detailed images; JPEG is recommended for regular product images).
3rd minute: Compress with TinyPNG (or Squoosh)
-
TinyPNG: Drag and drop the image → Automatic compression → Download. It can typically reduce the file size to about 40%–60% of the original (with minimal visual difference).
-
Squoosh (Google Open Source): Optional WebP output, quality setting 70, can further reduce file size.
-
Recommended output settings : JPEG quality 70–80; WebP quality 60–75 (better compatibility, smaller file size).
4th minute: Naming, Alt, and Export Format
-
Filename: Use an English phrase and include keywords (e.g.,
stainless-steel-valve-800x800.jpg) -
Alt text: One-sentence description + product model (for SEO benefit)
-
Format: JPEG or WebP is preferred for product images; PNG is preferred if there is a transparent background.
5th minute: Upload to the website and verify.
-
After uploading, open the page in your browser, press F12, go to Developer Tools → Network, and view the image size and loading time.
-
If it's still too large: go back to TinyPNG and compress it again, or switch to WebP files.
Recommended free tools (categorized by purpose)
-
Fast compression : TinyPNG/TinyJPG (for web pages), Squoosh (supports WebP)
-
Online photo editing (free, no installation required) : Pixlr (easy to use), Photopea (powerful features, Photoshop-like)
-
Offline editing : GIMP (open source and free), ImageOptim (free for Mac, excellent compression), RIOT (Windows)
-
One-click background removal/cutout : remove.bg (Free, limited quantity)
-
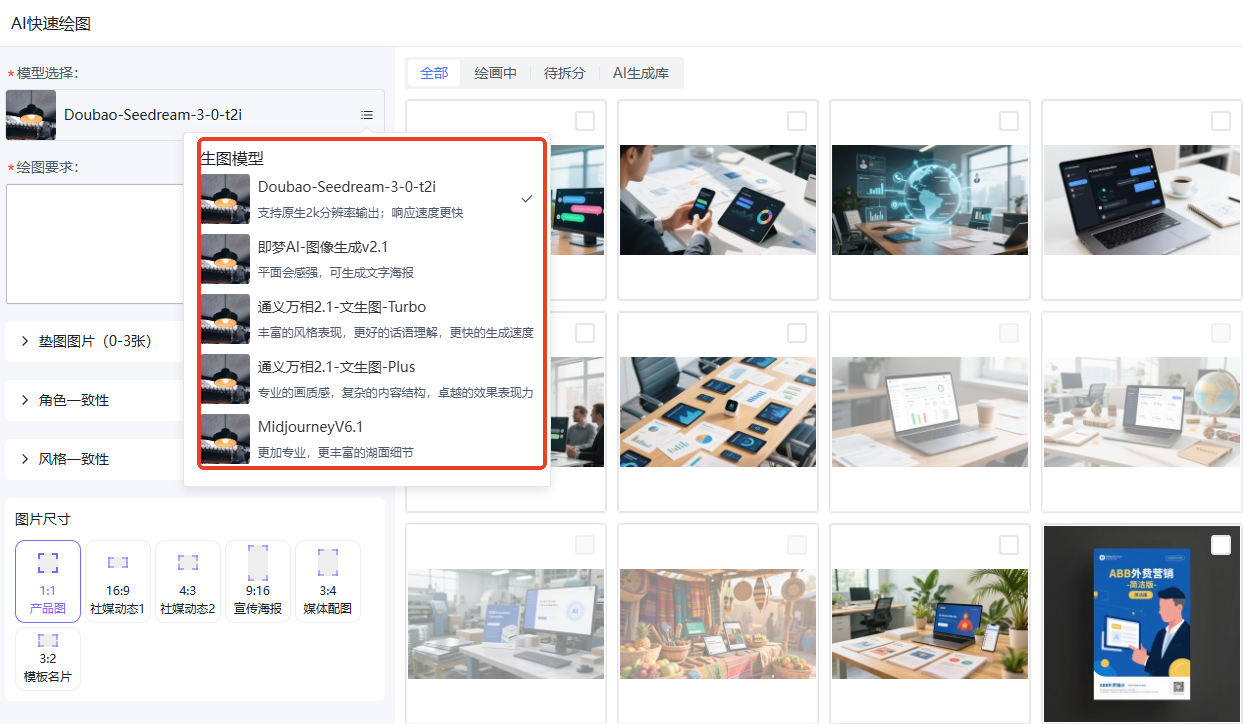
Image generation (AI) : AB Customer integrates with Midjourney / Doubao / Jimeng—allowing for one-click generation of product images, social media images, article illustrations, and promotional posters.
-
Lightweight image hosting/CDN : If you are using a CMS or website building platform, prioritize enabling CDN or image optimization plugins (that can automatically generate WebP and perform lazy-load).
Output suggestions (target size reference for various image types)
-
Desktop Banner (1920×700): Target < 300–500 KB (JPEG/WebP)
-
Product 800x800 thumbnail: Target size 30–120 KB
-
List thumbnails 400x400: Target < 50 KB
-
Icons/Vectors: Use SVG (very small and scalable)
Be careful not to reduce quality too much for a smaller file size—visible blur will reduce conversion rates. Check the results first before reducing quality.
Advanced optimization (can be done gradually after website construction)
-
Responsive images (srcset) : Load images of different resolutions for different screens, saving mobile data usage.
-
Lazy loading : Loads visible images only when the user pulls down (native
loading="lazy"). -
WebP preferred, fallback to JPEG/PNG : Most modern browsers support WebP.
-
Automation : Images hosted on an image-optimized CDN (such as Cloudflare or the platform's own CDN) can be automatically converted and cached.
-
Retina support : Prepare 2× resolution images for key visuals (such as logos and main images) and then compress them.
Real Case Analysis
Case A: Product page of a foreign trade machinery parts manufacturer (hypothetical example)
-
Problem: Manufacturers directly upload original images from their factories (4000×3000, 2–5MB), causing the page to take 6+ seconds to load.
-
Post-processing procedure:
-
Change the target image width to 1200px → Use Photopea to scale.
-
Pixlr: Fine-tune brightness and contrast, and slightly sharpen.
-
TinyPNG compression reduced the file size from 3.2MB to 180KB (approximately 5% of the original size).
-
Use
srcseton the page to load a 600px image on mobile devices.
-
-
Results: Page loading time decreased from 6 seconds to 1.8 seconds, bounce rate decreased significantly, and inquiry rate increased.
Case B: Independent Website for Export Consumer Goods (Daily Necessities)
-
Key points: Product images and scene illustrations are required.
-
practice:
-
The scene image (1920 pixels wide) is rendered at a slightly higher quality (WebP quality 75) to maintain visual appeal.
-
Thumbnail 800x800, compressed with JPEG quality 75 to reduce bandwidth.
-
AB Customer's intelligent website builder can generate social media images and article illustrations with one click, saving photography costs and maintaining a consistent style.
-
-
Results: The social media cover image and product page visuals are consistent, and the conversion rate of traffic brought by social media has increased.
Common Mistakes and Suggestions for Beginners (To Avoid These Pitfalls)
-
Myth 1 : Uploading original images directly from the supplier → This slows down the site.
Correction : Scale first, then compress.
-
Myth 2 : Excessive compression leads to ambiguity → affecting purchasing confidence.
Correction : Visual inspection, set JPEG to 70–80 or WebP to 65–75.
-
Myth 3 : Focusing only on the desktop and ignoring the mobile version → Poor mobile user experience.
Correction : Use
srcsetand move the thumbnail. -
Myth 4 : Ignoring Alt text and filenames → Losing SEO benefits.
Correction : Use standardized naming conventions and provide brief descriptions.
Add image optimization to your website building workflow (suggested checklist)
-
1. Capture the image → 2. Zoom to the target pixels → 3. Fine-tune with Pixlr/Photopea → 4. Compress with TinyPNG/Squoosh → 5. Name the image and add Alt text → 6. Upload and configure
srcsetand lazy-load on the page → 7. Check loading time with DevTools.
If you are using an international trade platform like AB Ke Smart Website Builder (which supports integration with AI such as Doubao, Jimeng, and Midjourney to generate product images, social media images, article images, and promotional posters with one click), you can:
Generate images that match your brand style directly on the platform, saving you the cost of taking photos;
After generation, compress and export the image using the above process with one click, or let the platform's image optimization plugin handle it automatically.
Summarize
Don't upload the original image → Scale it first → Fine-tune it → Compress it with TinyPNG/Squoosh → Export it as WebP/JPEG → Fill in Alt + srcset + lazy-load.
Follow this process, and you can turn an original image into a website-friendly image in 5 minutes.
Related articles:
One website building tip a day | What are the essential things to do before building a website?
A daily tip for building a website for foreign trade: How to change the template images and buttons?
.png?x-oss-process=image/resize,h_100,m_lfit/format,webp)
.png?x-oss-process=image/resize,h_100,m_lfit/format,webp)

.png?x-oss-process=image/resize,h_100,m_lfit/format,webp)
.png?x-oss-process=image/resize,h_100,m_lfit/format,webp)
.png?x-oss-process=image/resize,h_100,m_lfit/format,webp)
.png?x-oss-process=image/resize,h_100,m_lfit/format,webp)
